| How To Use Pagefly: Get started within 6 mins | 您所在的位置:网站首页 › pagefly free › How To Use Pagefly: Get started within 6 mins |
How To Use Pagefly: Get started within 6 mins
|
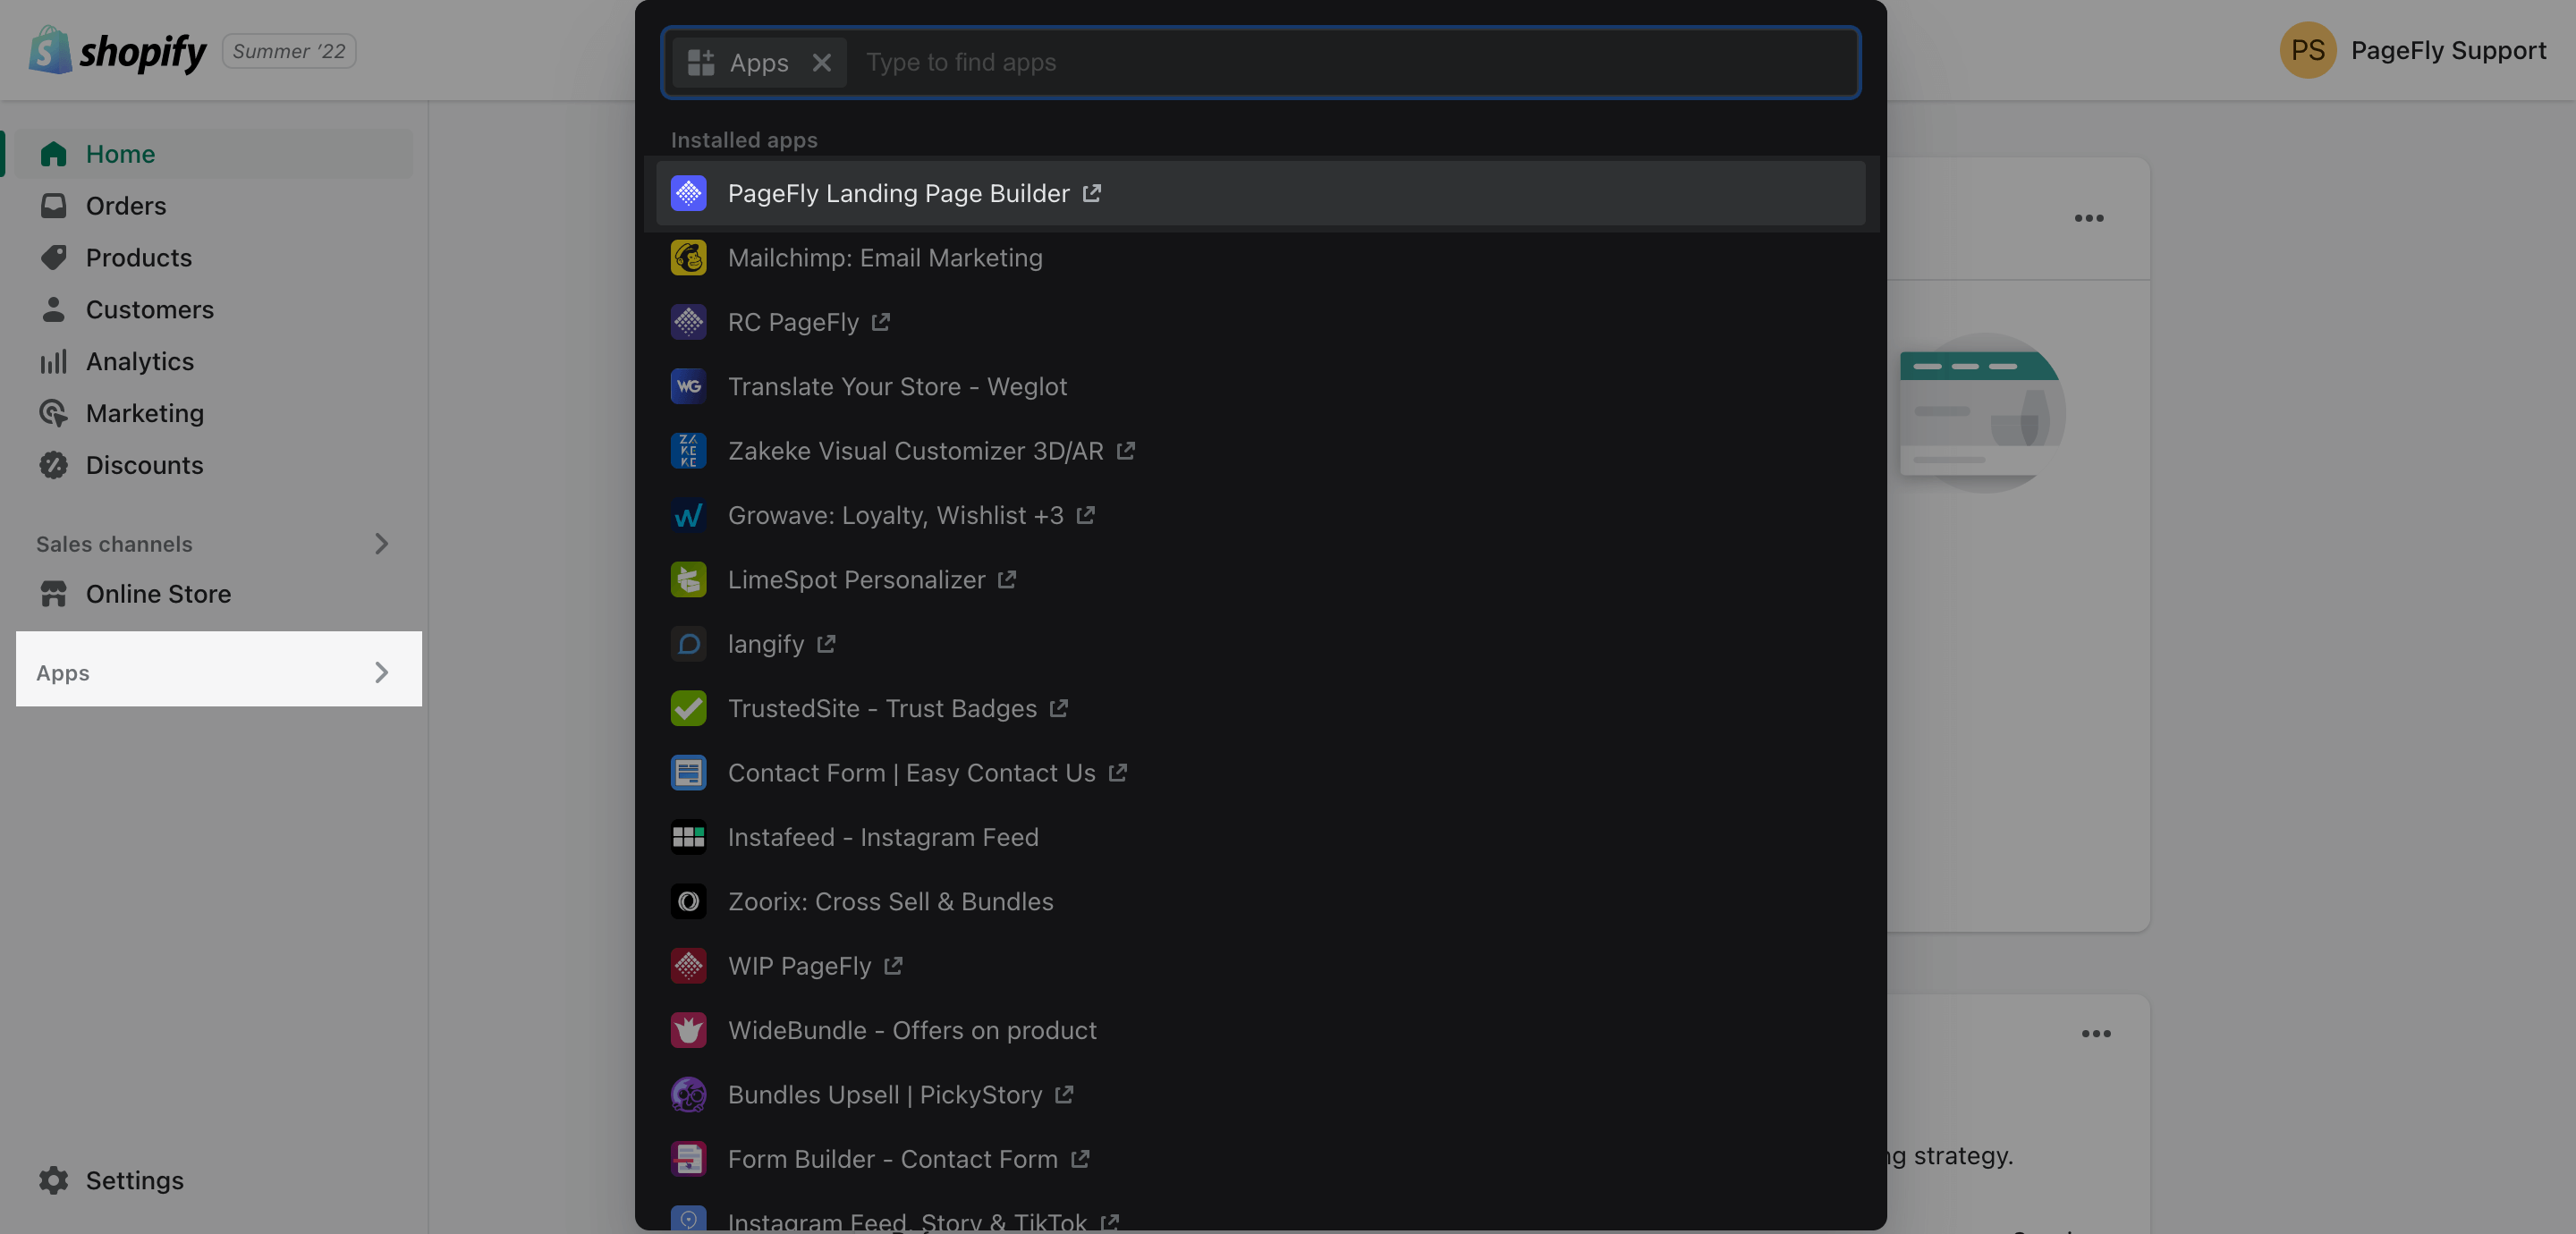
This video will show you how to get started within 6 minutes with PageFly, let’s check it here: In this article, you will learn how to create a simple page with the key features and tools. Step 1: Install the PageFly page builderIf you already installed the app, skip this step and move to the next one. Visit the PageFly page on Shopify App Store, click the Add App button and fill in your store’s URL to install the app to your Shopify store. Simples. Step 2: Create a new pageIn the Shopify admin sidebar, click Apps > PageFly Landing Page Builder. After that, you will be redirected to the PageFly Dashboard on a different page.
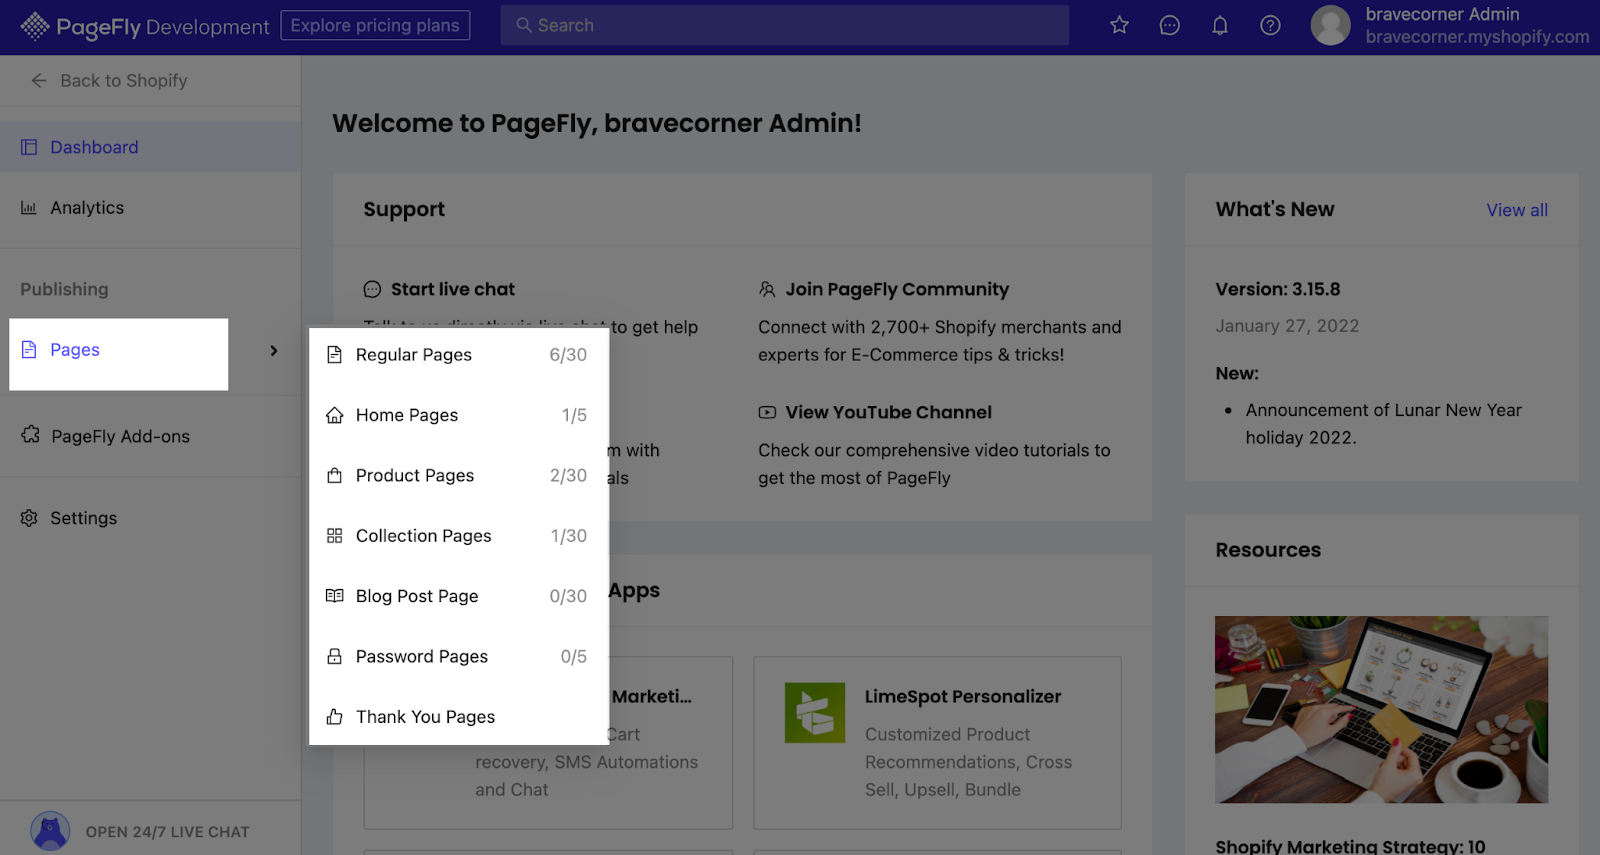
In the PageFly Dashboard, head to Pages > choose the page type you want to create.
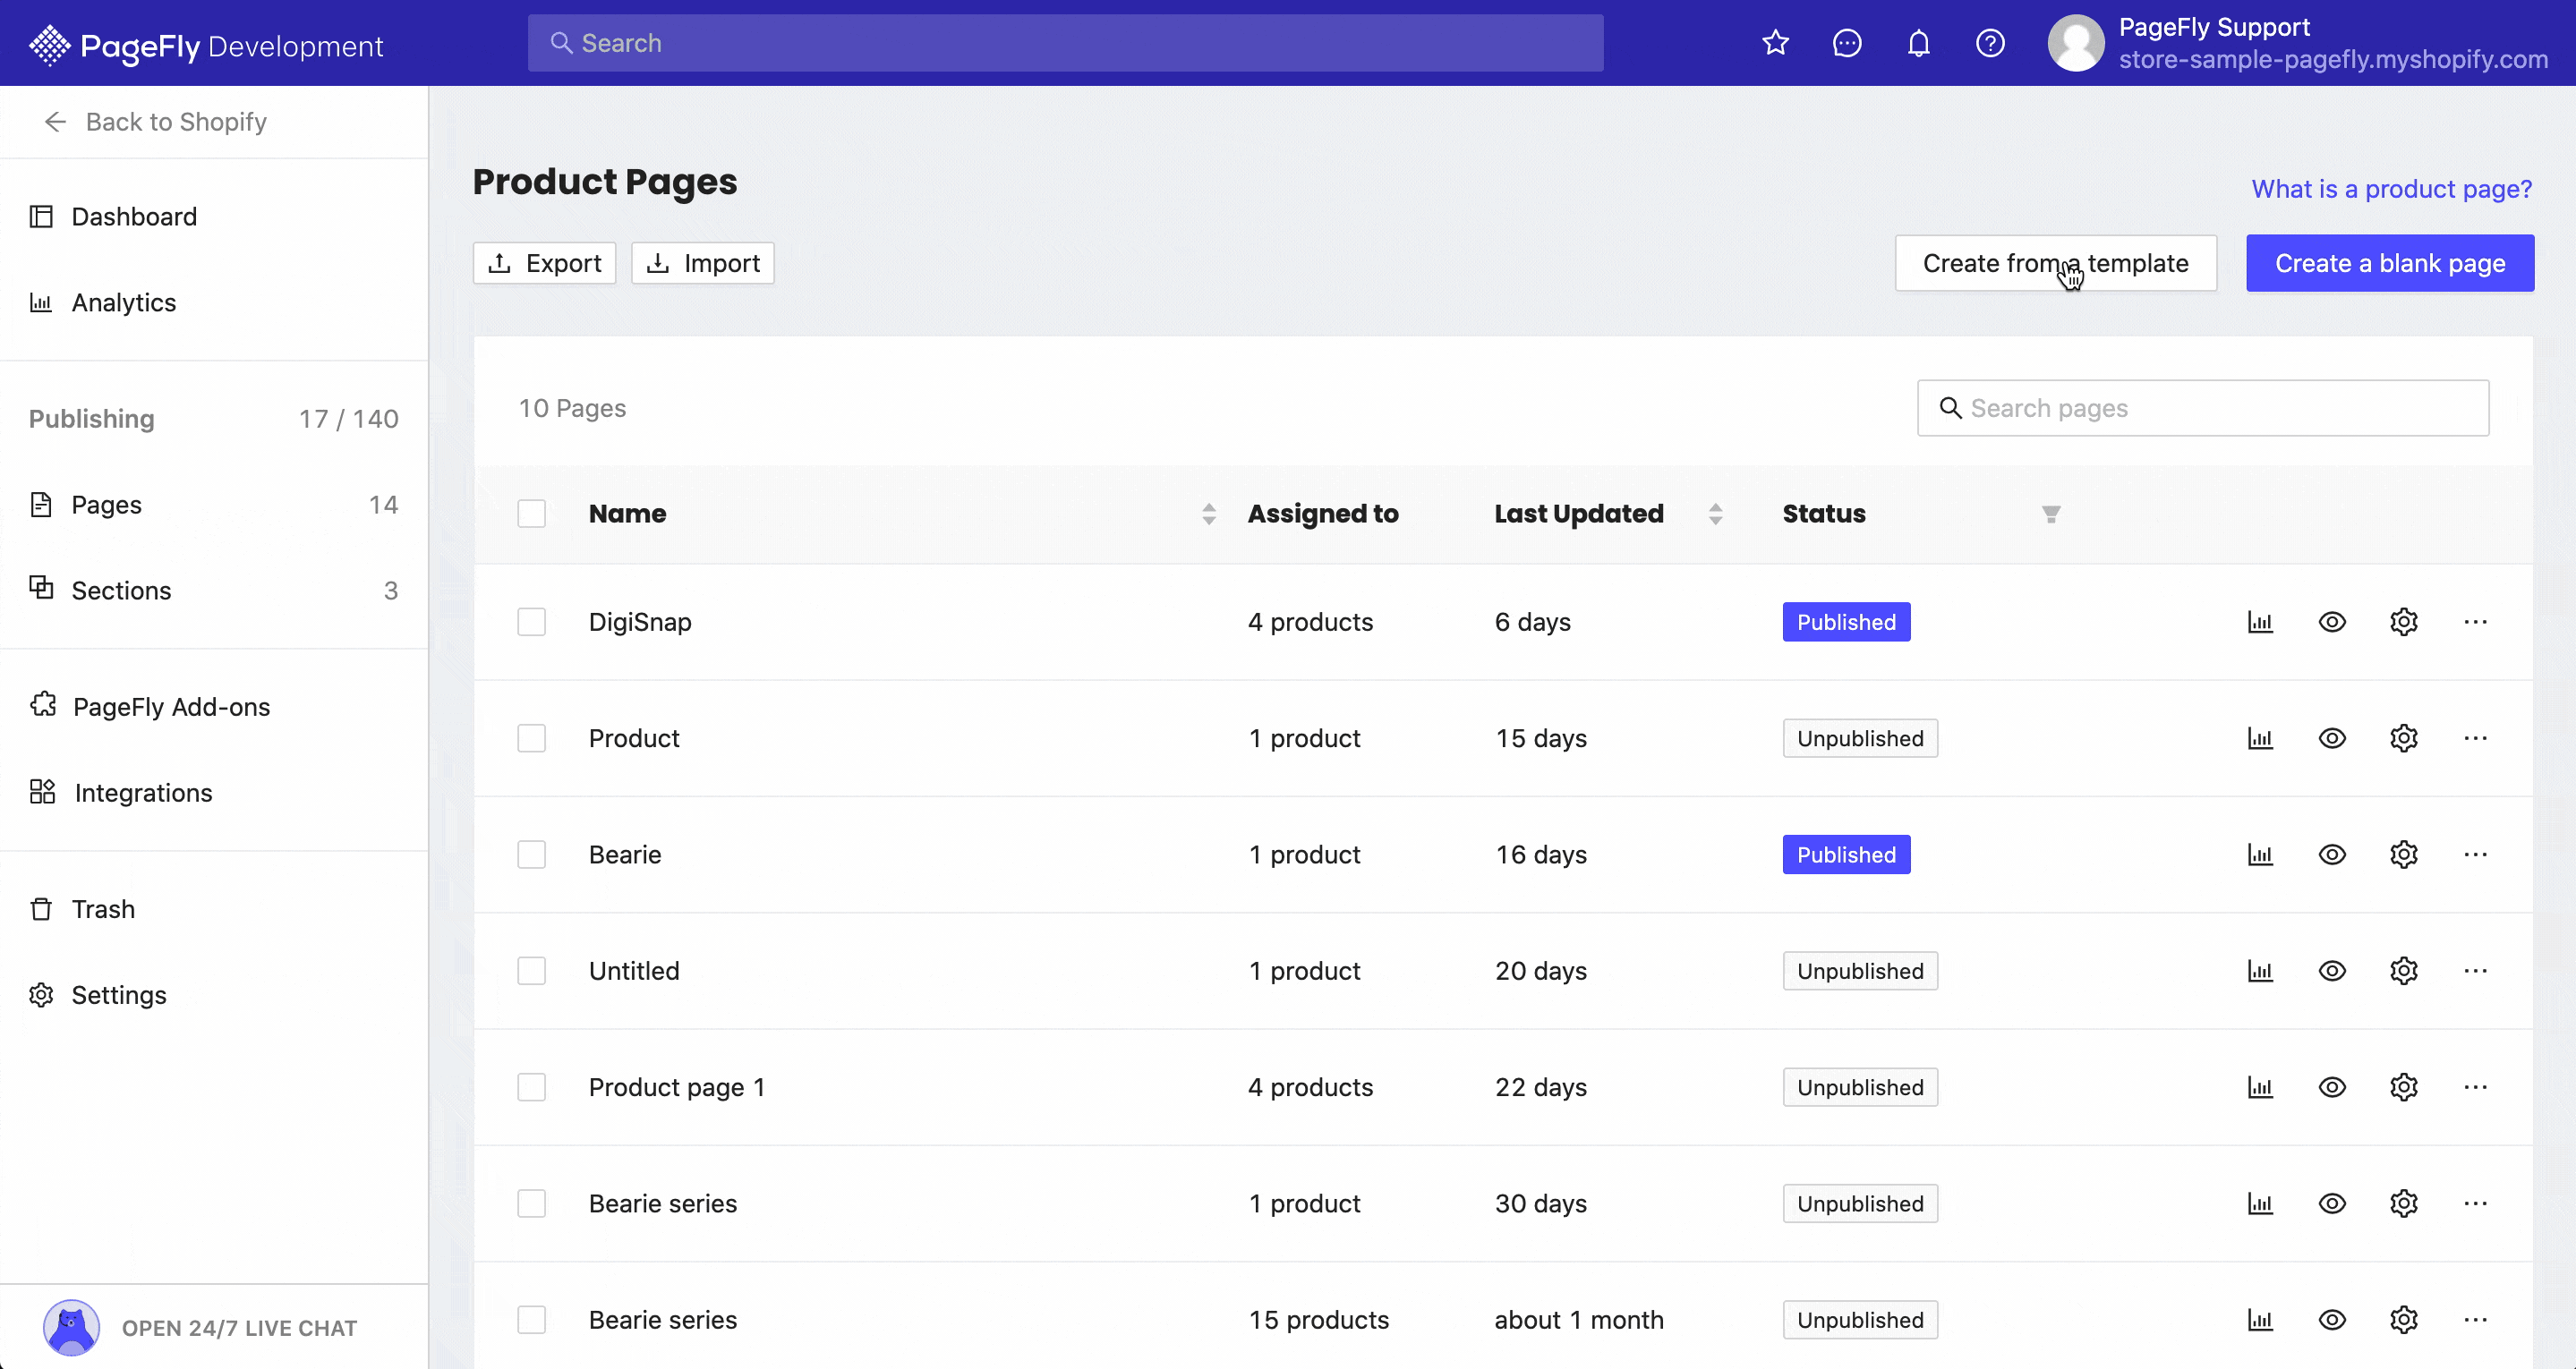
After choosing the page type, click in Create a new page to be directed to the page editor.
OR You can also choose to Create a new page from templates.
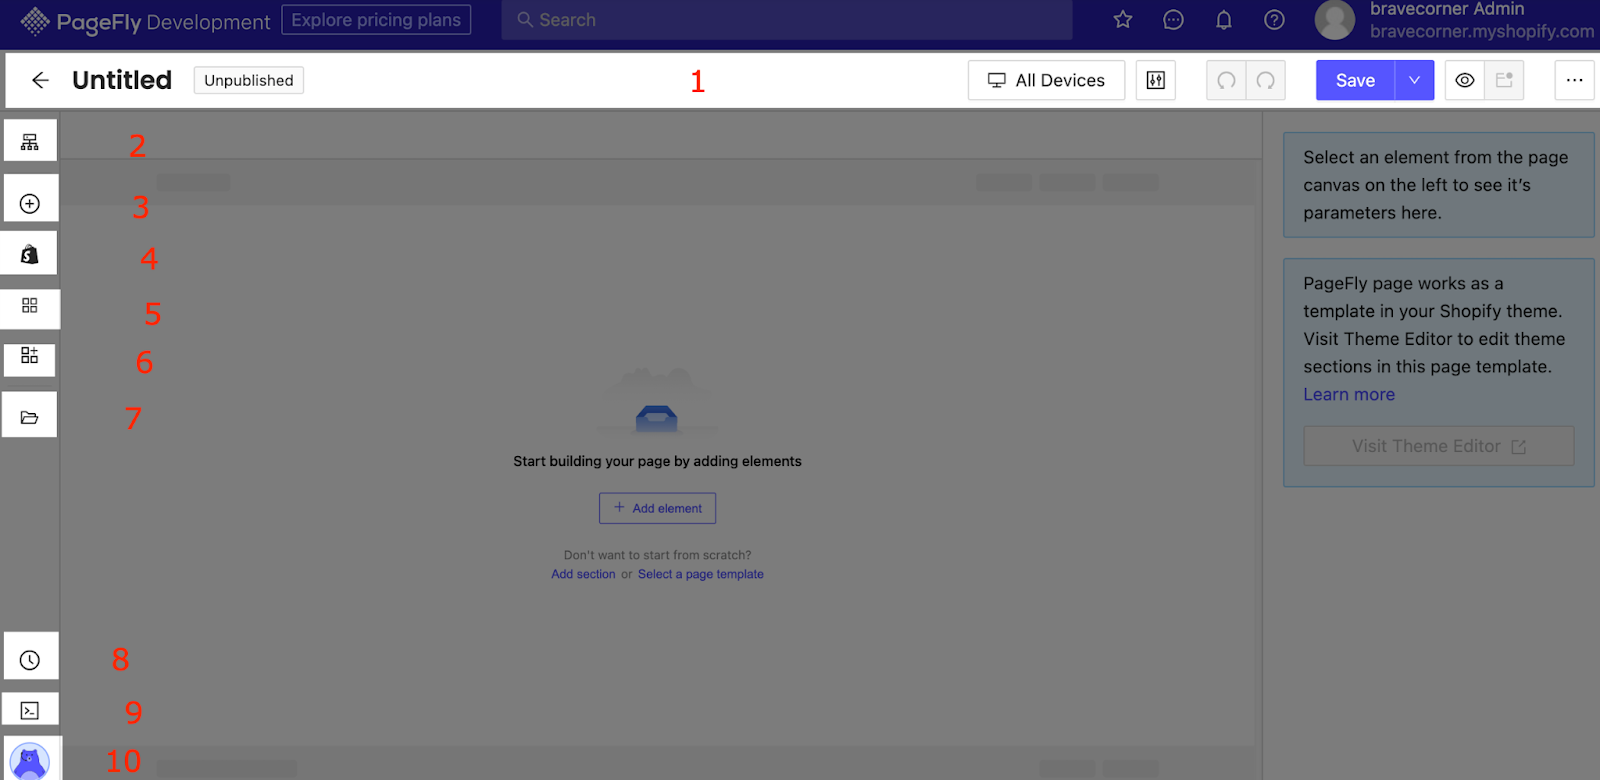
If you are wondering about how to create a landing page with PageFly, you can watch the video below Or you can use our template to build an awesome page: Step 3: Getting to know the key featuresHere are some features in the Page Editor to help you understand how PageFly works:
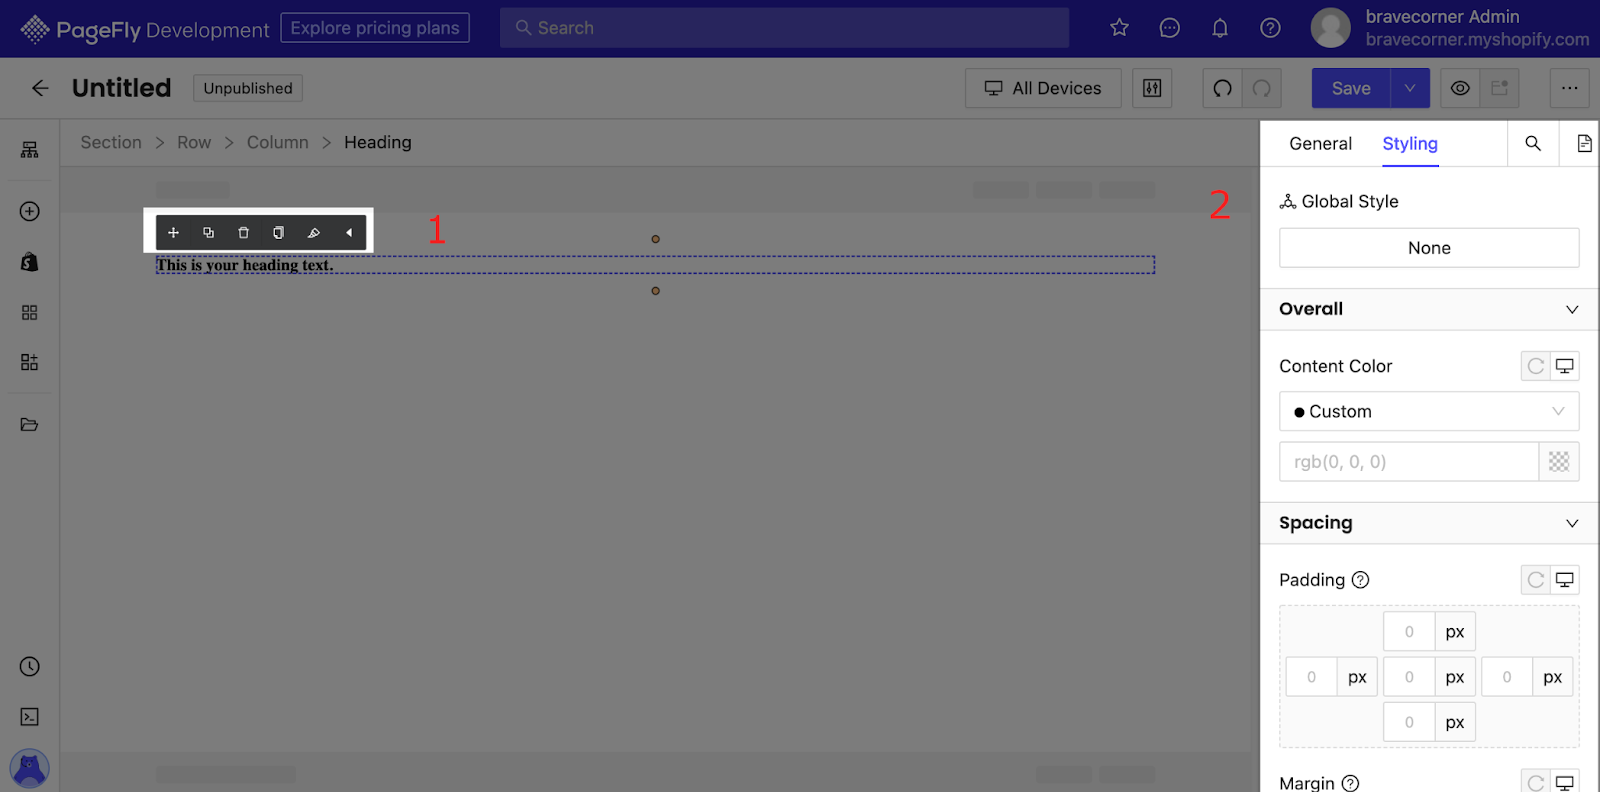
First, click Add Element > Element. Select the element and you can edit it with 2 tools:
Once you’re done building the page, hit Save. This option saves the page to a database but does not make it public yet. You can see the page preview via Preview. The Publish button both saves the page and makes it public. You can see the live page via Live View. The page will link to your store with the address “your-shop-name.myshopify.com/pages/page-name”.
You can check the PageFly page in the Shopify database by going to Shopify home > Sales Channels > Online Store > Pages. If you are still wondering about how to have a beautiful and attractive page with PageFly, do not worry, this guide will surely help you and give you the knowledge and practical information for PageFly users about crafting a perfect e-commerce page. |


【本文地址】